This step is required to configure Slack and make it to receive messages from the Gravity Forms submissions.
Prerequisites
- Slack Workspace
- Administrator access to the Workspace
Step by step guide
1. Create a Slack API “App”
In this step you need to create an “Application” that will be the starting point of accessing the Slack API and sending messages to your workspace through the API.
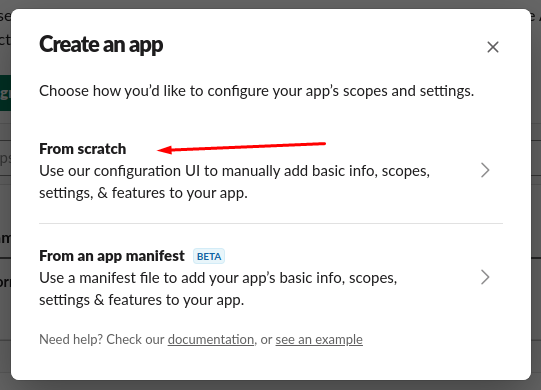
1.1. Create New App
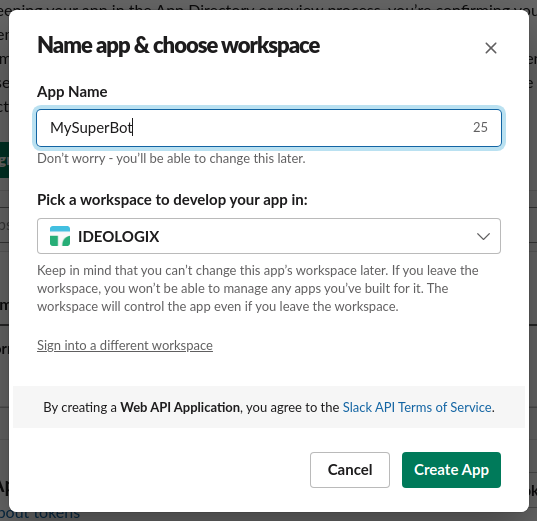
To create app, click here. (alternatively, go to the “Apps” page then click on “Create New App”), then choose “From scratch“, then give your app a name and select workspace for this app.
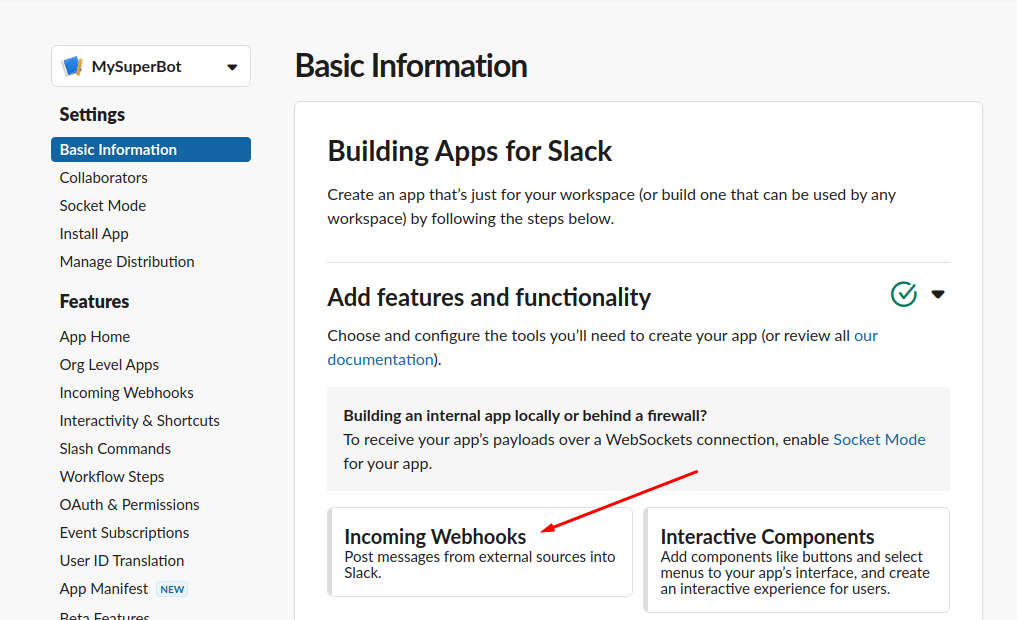
1.2. Configure the app “Incoming Webhooks”
As soon as you created the app, you will be redirected to the “App” page, then you need to select which features will be used by this app. Simply select “Incoming webhooks”, then you will be redirected to “Incoming Webhooks” page, finally enable this on the top right switch as per Figure 4.
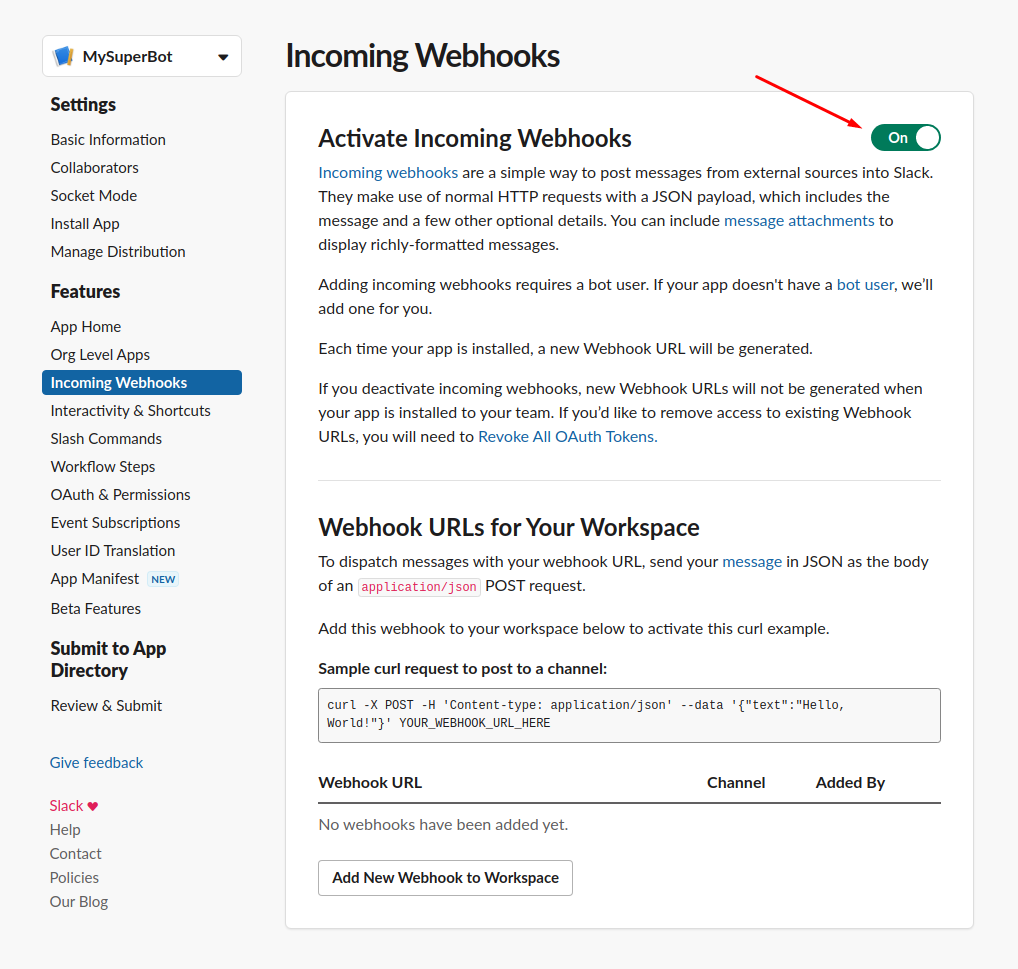
1.3 “Add new Webhook to Workspace”
Simply put, for each message types you need to create separate webhook and you need to configure separate feed in the Gravity Forms > “Slack Integration” feeds.
Example #1 – If you want to send message to specific channel once a form is submitted, then create a webhook and select the channel.
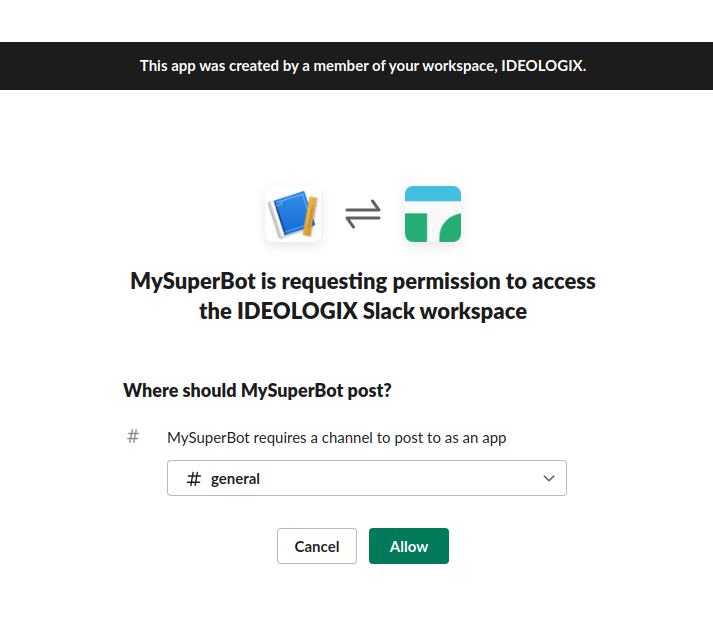
Once you click “Allow”, you will be given a web hook url, make sure you copy this url because it will be required in the Gravity Form setup.
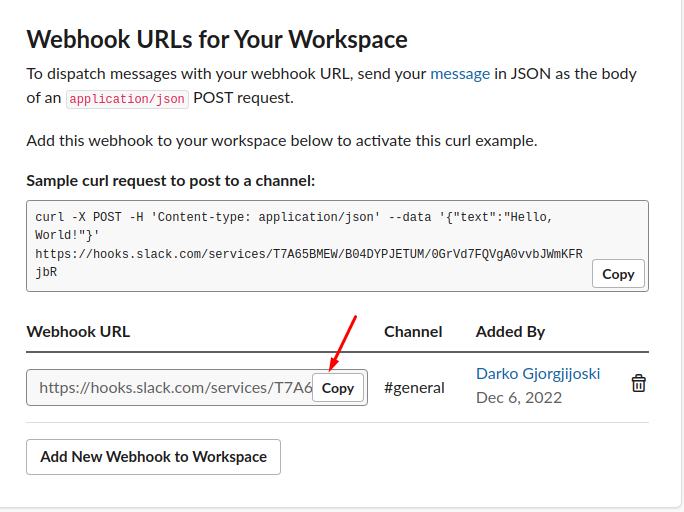
Voila! Your app is set up and once you “Copy” the webhook you are ready to proceed to the part two of the setup, click here to proceed.